群晖NAS构建开源电子实验记录本elabftw的方式与流程
elabftw简述
这是一个开源的电子实验记录本的github项目,仅支持使用网页访问,并且在当前时间(2024-06-29),相关的人员持续在进行更新与优化。仅支持网页说明其使用灵活,只要手头有能够访问该地址的设备,就可以进行使用。
电子实验记录本目前能找到的大部分都是商业化的项目,如果要进行本地化私人化的部署,价格以及灵活性上都很困难,elabftw提供了测试demo([Login - eLabFTW](https://demo.elabftw.net/login.php)),并且也可以导出相应的实验流程与步骤模板进行使用。我是闲来用手机测试了一下这个demo,就决定无论如何都要将这个平台部署在我的nas上,因为本来是想着部署在我自己的wsl2上,然后所有记录都通过本地进行管理,只做到一个备份的功能,但是发现能够随时调取记录以及使用,这个对于实验流程、样本、试剂、抗体乃至设备等多方面繁杂的生物实验来说,是十分便利与方便的。
此外,我在2018年就开始了个人nas以及实验记录的整理归档,当时简单将所有的实验思路与计划都放在一个word文档当中,然后我在2021年年底接触了obsidian这种双链本地记录库,了解到了卡片记事法以及相应的思维原点的理论,开始学习markdown语言并在电脑上部属相应的记录,同时稳定使用obsidian0.14.6版本(新版本过于花里胡哨,插件也用不习惯,更麻烦的是其启动速度急剧下降),本身也会linux以及R语言,因此对于这种系统的维护是比较有心得跟经验的。为了便于我自己的理解以及秉持着开源共享的精神,我在这里将我自己设置部署elabftw期间踩到的坑以及新发现的一些特性,在本文中进行共享,也是给我自己部署相应环境提供了经验,因此本文对技术细节以及一些流程详略不得当,是建立在我自己的认知的基础上,可以理解是一篇我写给我自己的环境建立与部属的指南。
elabftw最重要的特性,我认为是两个,一个是其整体架构仅为一个外壳,不随版本变化,类似于word程序本身,不论什么版本都能读取word文档,另外一个就是其数据使用了简单易懂、易于备份的mysql数据库基础,就类似于word文档,不论什么版本的word都能对其进行读取,如果要迁移,只需要拷贝或者备份相应的数据内容即可。
要说明的一点是,在备份的内容中有两个必须备份以及一个建议备份。因为elabftw是完完全全的基于docker部署的架构,因此其仅涉及一个mysql数据库文件夹以及upload文件夹的备份(这个可以在官方的部署在install nas中看到,但是那个仅说了威联通的,并且全是源码内容,因此并不合适),此外建议对后续说明的yaml构建文件进行备份,因为其中包含相应数据的密匙以及详细代码,我没有尝试将相应的密匙更换后是否能正常运行(因为没有必要)。
以下进行相应流程的说明。
一:使用群晖NAS构建elabftw的前置条件
1. 拥有能够使用SSH进入到群晖的linux系统当中进行相关命令行运行的群晖版本(有的版本不支持,需要明确是否能够使用`docker exec -it elabftw bin/init db:install`命令{其中的`elabftw`是默认内容,如果修改了elabftw,则在后续docker yaml配置文件中进行修改}),一般是手动启动SSH,我建议设置完毕后就将其进行关闭。
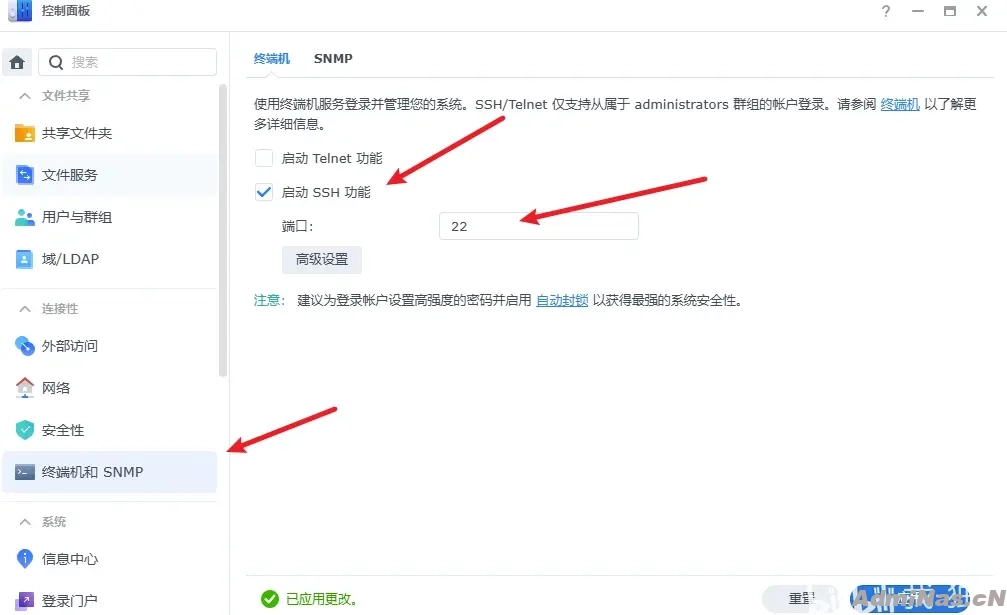
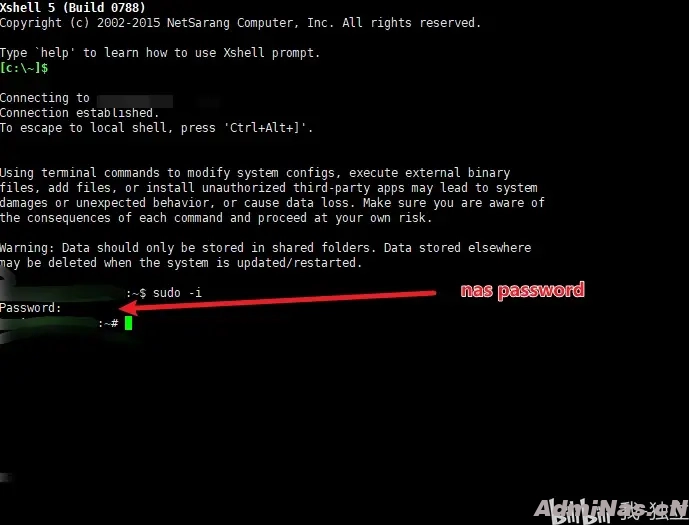
在进入后,输入`sudo -i`,然后输入nas的对应账户的密码,就可以进入root账户了。之后在这个页面待命即可,或者输入`cd ..`进入到其他的文件夹当中,这些操作就是基本的linux操作。
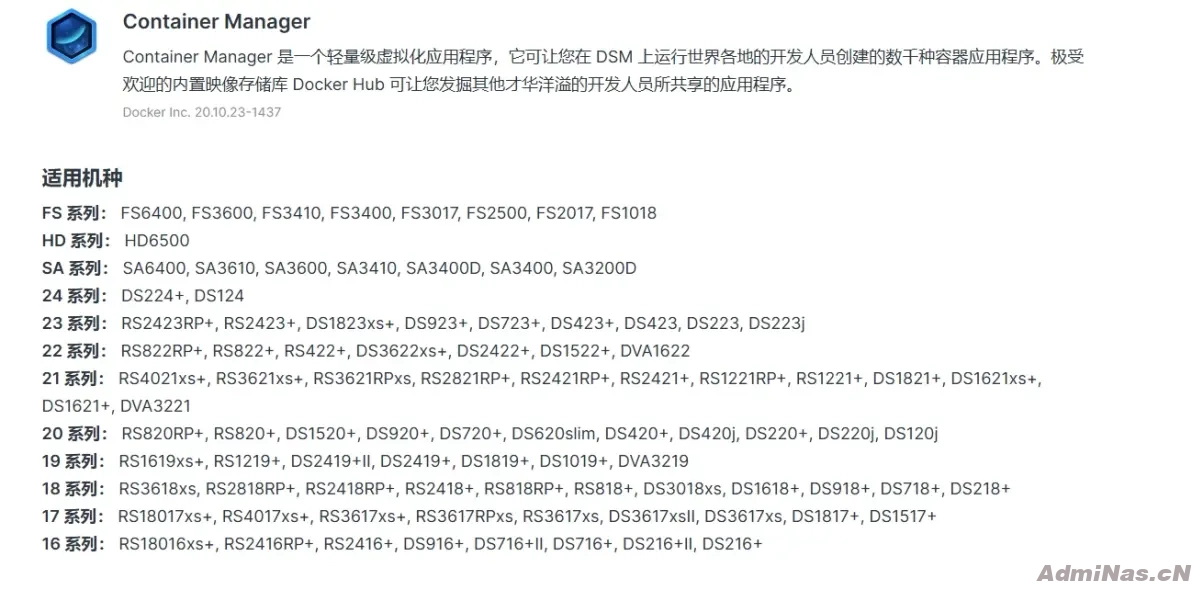
2. 拥有能够使用群晖docker容器(官方名称在7.0DSM版本后叫做container manager)的群晖个人或企业级nas

3. 能够获取elabftw的docker镜像
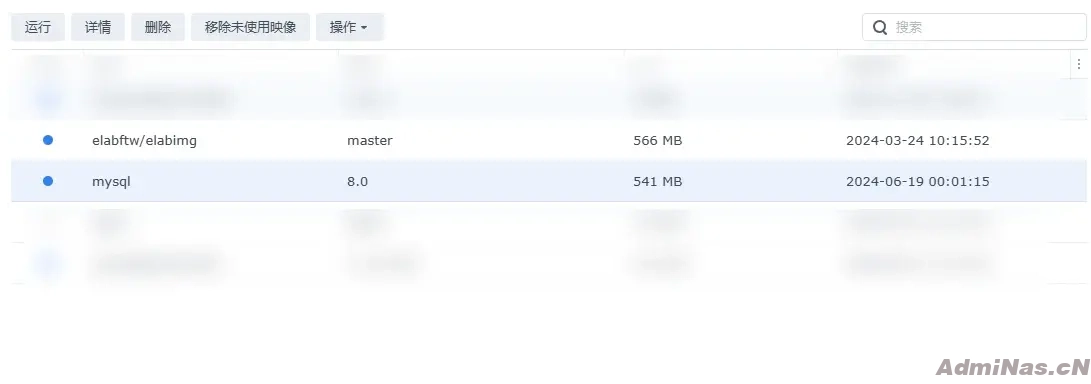
,在
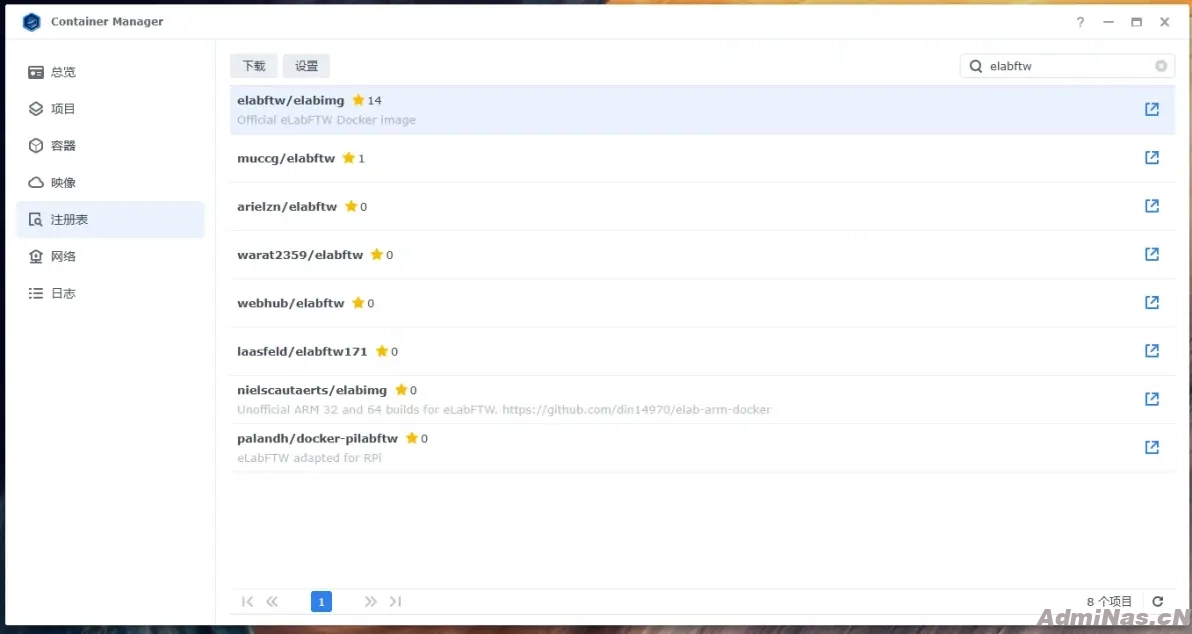
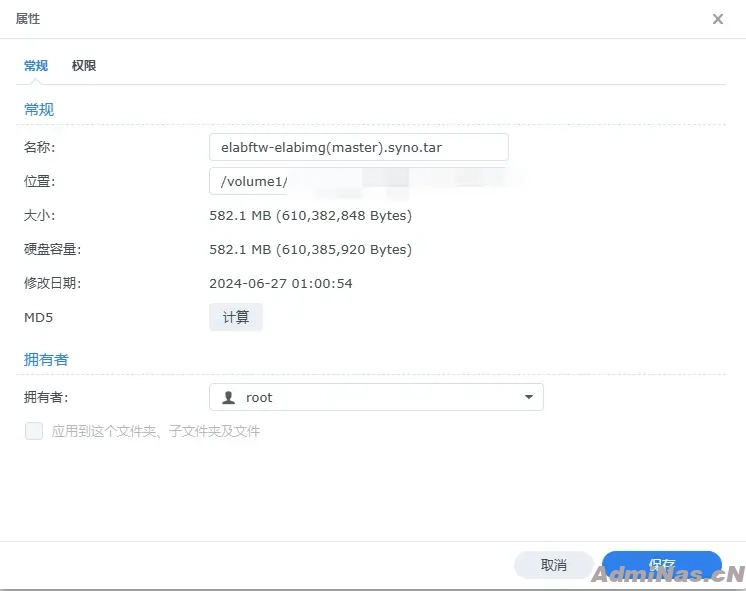
[elabftw/elabimg - Docker Image | Docker Hub](https://registry.hub.docker.com/r/elabftw/elabimg)当中,官方对版本控制进行了说明,我的建议是下载master镜像,该镜像中自动包含设置所需要的mysql以及elabftw镜像。如果无法下载,那可以去参考或者设置相应的镜像地址进行获取,这里不对相应的无关流程进行赘述。个人建议将相应的镜像在获取后使用镜像页面的导出功能进行导出保存。
4. 家中有IPV6网络地址,或者手头有可以进行frp穿透的机制,这是保证可以在除了家内的局域网地址保证访问elabftw,还可以随时在任何时间任何地点自由轻松得访问实验记录本。由于国内所有的手机的地址均为IPV6,因此只要你的群晖nas使用了自带的群晖IPV6域名解析功能(毕竟这个功能是群晖自带的,不愧是买软件送硬件),那么通过合理的设置,就能保证你能够通过手机或者平板随时访问你的实验记录本。
二:使用群晖构建elabftw的流程
1.获取镜像
参考上述流程,在本机当中获得镜像。可以在docker中查看,也可以在linux当中查看。

2.镜像的安装
这里不同于官方说明,直接在容器的项目中进行设置。
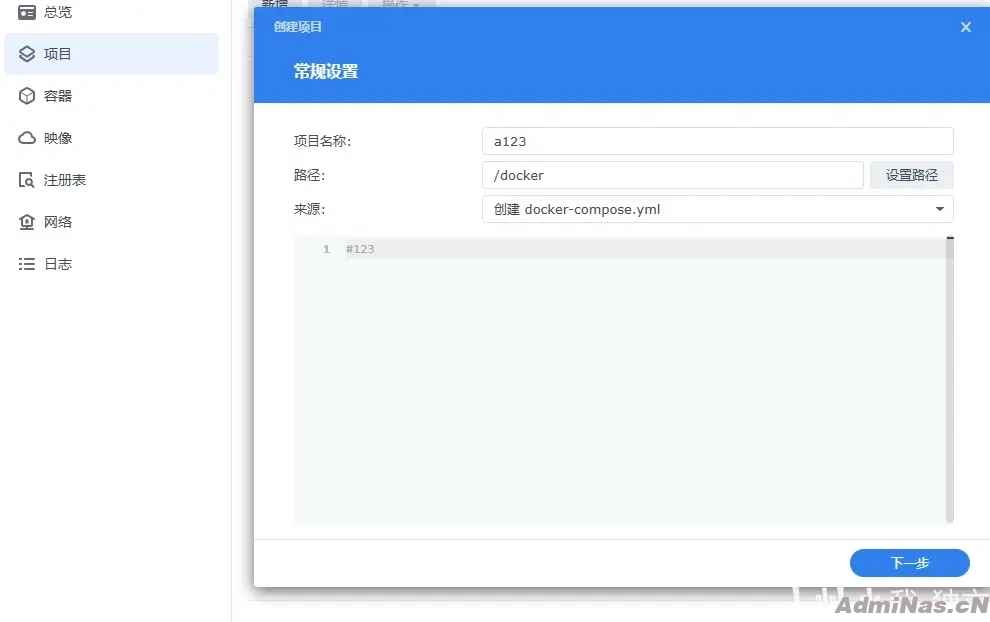
选择新增项目,然后在项目名称当中输入你自己想要的名称,然后路径是决定保存这一yml文件的地址,可以与后续链接的mysql文件夹以及upload文件夹处于相同的一个文件夹内,也可以单独存放在任意地方,这个不影响使用。
这里输入`#123`,将yaml留空,先完成流程的准备。
不对网页门户进行设置,跳过。
然后选择不创建后立即启动,完成yaml空白模板的构建,此时就获取了一个完全空白的架构框。
之后在地址栏输入`https://get.elabftw.net/?config`,此时会自动下载一个`elabftw.yml`的文件,这个文件当中关键的几个密钥,是完全随机生成的,如果你不放心就可以手动进行修改。
接下来我会基于该文本,将我知道的一些内容设置以及需要注意的内容,以#号注释的方式在文本中列出,在完毕后,将该文件中的所有内容,全部导入到前述获得的`YAML配置`区域下。
我进行修改与添加的部分会以`#备注:`开头,并且全文当中的密匙部分,我在这个公开的文档中以`密匙`进行中文替代。
文件夹在群晖中的映射,一般是类似`/volume1/群晖的一级文件夹名/群晖的二级文件夹名/upload`以及
`/volume1/群晖的一级文件夹名/群晖的二级文件夹名/mysql`,因此在文档中我按相应内容进行填充。
文档中的其他部分都便于进行说明,因此我将文档内容附在最后,这里着重讲一下语句中的`- SITE_URL=`这一个内容,这个内容是必须设置但是又很容易让人误解的内容范式,并且为我在使用与设置中,发现了一些取巧跟有意思的点,因此单独拉出来进行说明。
首先是官方文档所说的

https://YOUR.NAS.IP:3148 经过我的测试,是完全无法使用的,如果要使用这一句话,那么必须在`- SITE_URL=`当中加入一个`https://YOUR.NAS.IP:访问端口`的值(这个我也在文档中加入了,3148是访问端口,由于elab禁止了子域名的访问,因此在所有的设置中,这个访问端口是必须统一的,为了防止有人误用,因此我统一使用访问端口替代)
此外,这个域名是可以进行多个设置的,也就是说可以通过多个域名与地址导向同一个电子实验记录本,同时如果有frp穿透,那么可以通过一个frp服务器的不同端口,导向不同的实验记录本。
这里的多个的话,会选取最下面的一个进行即刻调用,如果要访问登录地址,必须在相应的端口信息后,加入`/login.php`。
在设置好yaml内容后,就可以导入然后保存,要注意yaml需要所有注释在同一列平齐。
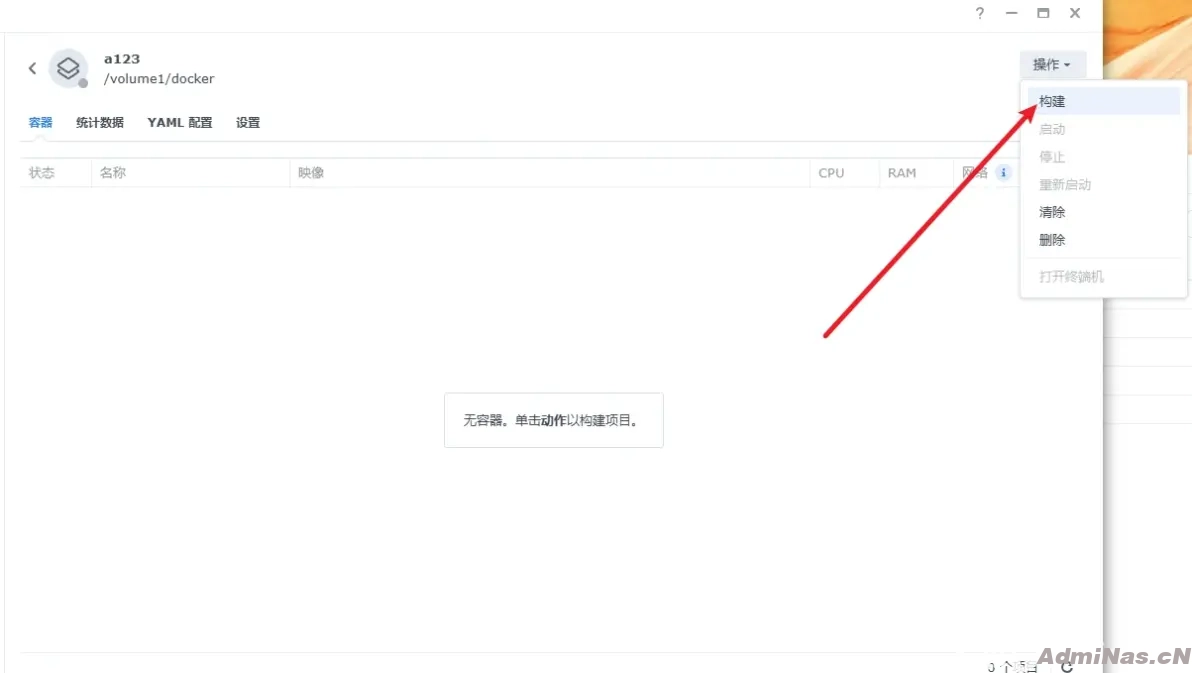
3.构建服务器
点击右上方的构建
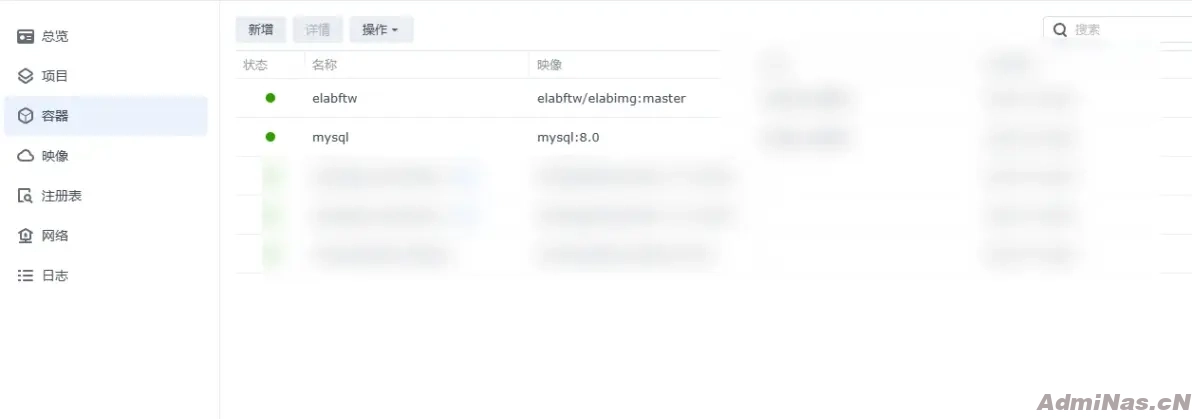
这也就是相当于官方所说的`docker compose up -d`,之后会创建两个容器。
这个时候可能会报错或者有其他问题,我提供的yaml模板,已经把相应的内容给注释掉了,就是restart相关的两个。
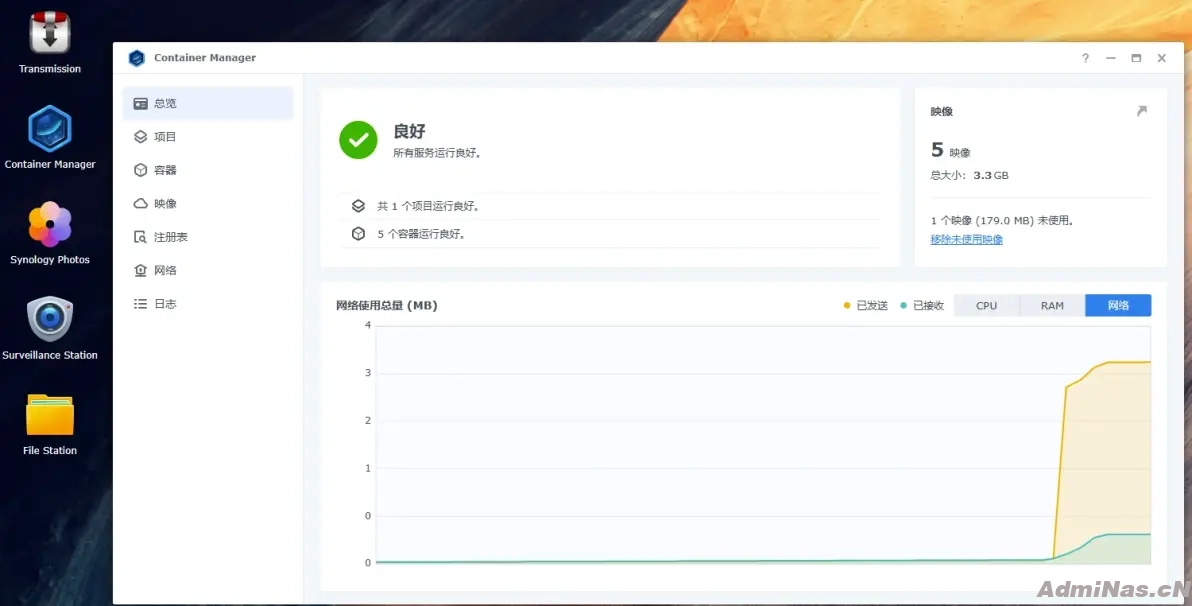
此时elabftw应该已经运行,可以在gui界面或者在ssh当中输入` docker stats`查看(ssh使用ctrl+c退出显示界面)已经运行的容器。
由于以上yaml文件中,默认elabftw的容器名都是elabftw,因此在ssh界面中,运行`docker exec -it elabftw bin/init db:install`即可。
因为我已经有了服务器,因此会显示`Database structure already present. Skipping initialization.`
此时如果从群晖界面查看具体的mysql文件夹,当中就会有新的文件。
当一切设置完成并且运行正常后,可以在容器的设置参数中,设置这两个容器的自动重启。而在存储空间设置中,可以看到对应的外部文件夹。
三:elabftw的使用
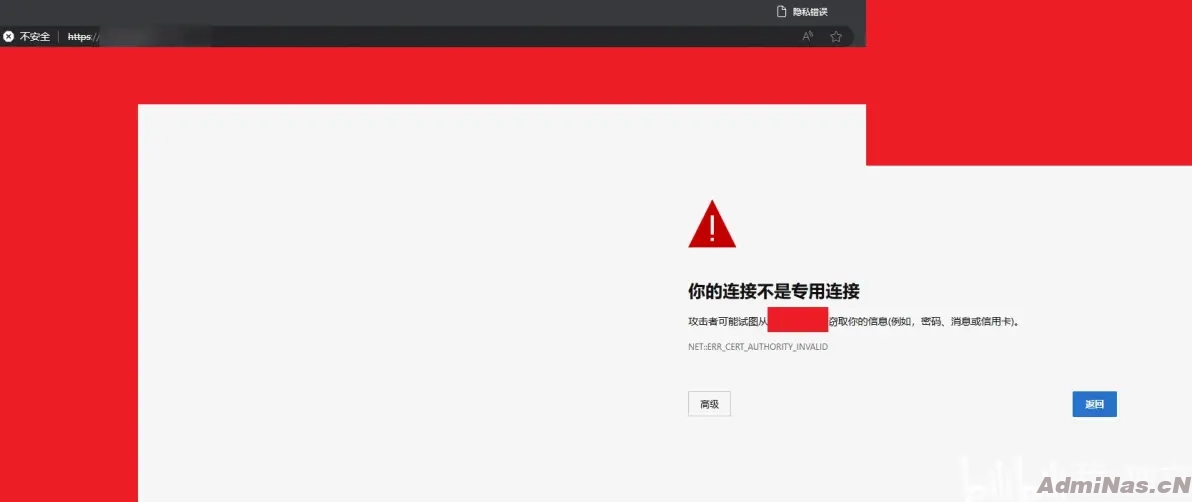
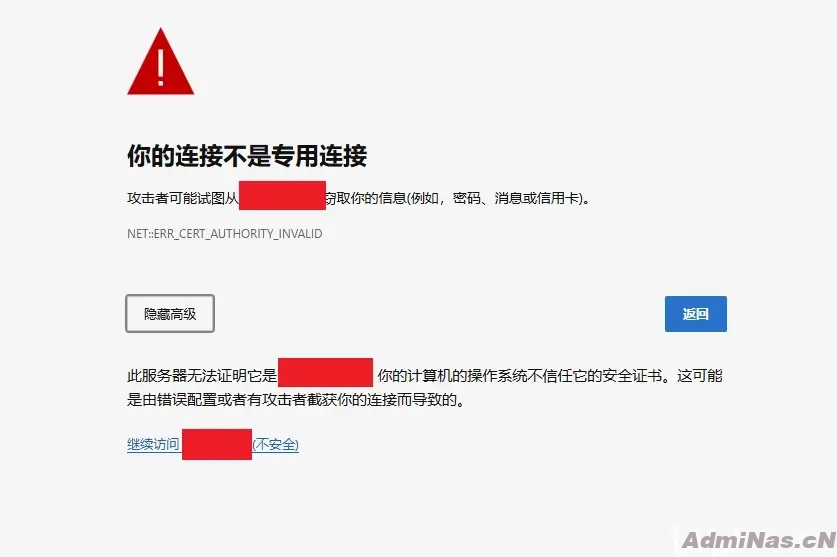
在设置好了相应内容后,可以先使用局域网IP地址进行访问,注意必须使用https的访问地址。如果不同域名地址要访问,就必须加上`/login.php`
一般会有这么一个提示,继续访问即可
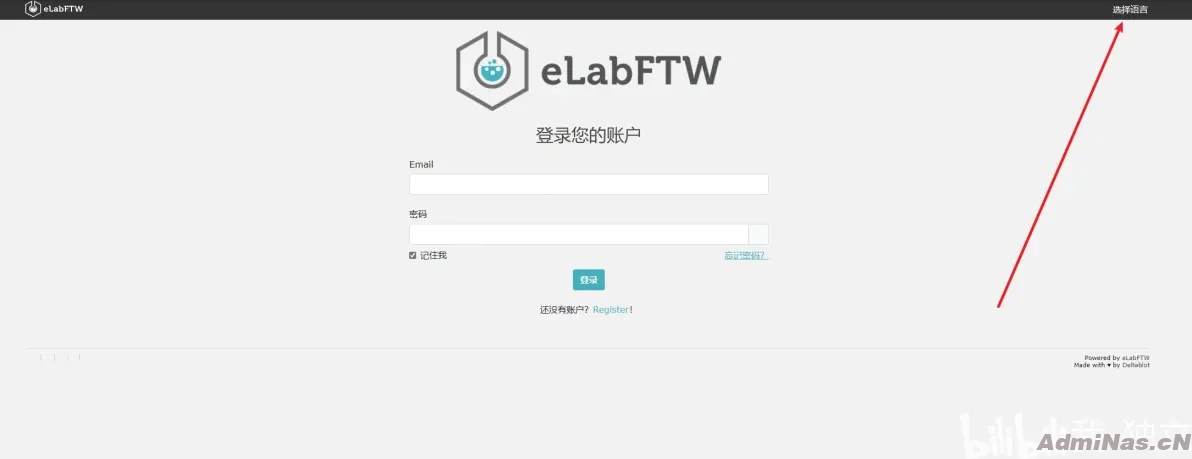
之后就正常进入,然后需要设置对应的语言。此时即可关闭群晖当中的SSH端口
四:elabftw的设置
因为一般都是用中文进行管理,因此后续均按照中文参数进行说明。
elabftw默认第一个注册的用户是最高权限管理员。
对于中文用户,不论是否是管理员,需要在用户面板(进入后叫个人管理面板当中),将PDF配置的`生成PDF的时候嵌入中文、日文和韩文字体`启用,否则中文就不能被识别。
然后对于资源当中的模板,例如对抗体、试剂、样本等设置导入的模板,是在团队管理面板当中的资源类别当中进行添加管理,而实验的模板在个人管理面板当中进行管理,团队管理面板只是定义相应的实验模板的类型。
elabftw的使用,更重要的是第三方独立的溯源审查,因此一个实验或者资源设置后,会强制给一个系统的编号。同时还可以在实验或者资源上进行时间戳以及加入区块链的设置。
以上就是在群晖nas当中构建elabftw的流程,后续使用可以参考相关的英文资料进行。
附录,yaml文件内容
# docker-elabftw configuration file
# use : "docker-compose up -d" to start containers
#备注:因为是在群晖的gui界面进行设置,因此上一行的命令不用进行。
# this config file contains all the possible configuration options, shown with default values
# https://hub.docker.com/r/elabftw/elabimg/
# https://www.elabftw.net
# this is the "compose project name"
# see: https://docs.docker.com/compose/compose-file/04-version-and-name/
#备注:下面这个是elabftw通过yaml构建后,产生的名称,这里注释掉
#name: elabftw
#备注:下面一行是我的版本当中有的一个语句,因此我保留在这里,意义不明
version: '3'
# our first container is nginx + php-fpm + elabftw
services:
web:
# the latest tag points to the latest stable version
# use the next tag to use alpha/beta version
# use a specific version to pin the image
# example: elabftw/elabimg:4.0.5
# default value: elabftw/elabimg:5.0.4
#image: elabftw/elabimg:5.0.4
#备注:原始语句为上面的内容,但是因为下载的是master版本,也就是前面配图中展示的,因此镜像是master
image: elabftw/elabimg:master
# this ensures the container will be restarted after a reboot of the server
# default value: always
#restart: always
#备注:上面这一行必须要注释掉,因为如果不注释掉,默认产生的容器就会在即使出错的情况下也进行重启,因此要去掉。
# comment this out if you use several containers with redis, as you can't have several containers with the same name
# default value: elabftw
#备注:下面这一行是默认的容器名称,可以不进行修改,使用即可
container_name: elabftw
# make sure we wait for mysql to be available before starting
# comment this out if you're not using a mysql container
# note: the mysql container needs an healthcheck block for this to work
#备注:以下语句是有关mysql的,因此不用修改
depends_on:
mysql:
condition: service_healthy
# limit number of processes
# this option is commented out because it is not in v3 of compose files, only v2
# even though it works as expected in a v3 file with recent docker-compose
#pids_limit: 42
# add a security flag to prevent a process gaining new privileges
security_opt:
- no-new-privileges:true
# restrict capabilities of the root user to the strict minimum
# see CIS Docker Benchmark v1.5 5.3
# see ANSSI-FT-082 23/09/2020 R8
# WARNING: for Centos7/8, comment out these lines (cap_drop and cap_add)
# If you get this error in the logs:
# nginx: [emerg] bind() to 0.0.0.0:443 failed (13: Permission denied)
#备注:因为在群晖当中,上述的报错会一直持续,因此以下几行全部都注释掉。
# comment out these lines!
#cap_drop:
# - ALL
#cap_add:
# - CHOWN
# - SETGID
# - SETUID
# - FOWNER
# - DAC_OVERRIDE
# environment variables passed to the container to configure options at run time (when container is started)
# commented variables are optional
#备注:以下是mysql的设置,除非原来在容器当中有mysql,那么需要重命名环境以防止冲突才需要设置
environment:
#######################
# MYSQL CONFIGURATION #
#######################
# name of the MySQL server (by default "mysql" the name of the mysql container in default elabftw Docker configuration)
# you can put here the IP address of an existing MySQL server if you already have one running
# default value: mysql
- DB_HOST=mysql
# port on which the MySQL server is listening
# you probably don't need to modify this value
# default value: 3306
- DB_PORT=3306
# name of the MySQL database
# you probably don't need to modify this value
# default value: elabftw
- DB_NAME=elabftw
# MySQL user with write access to the previously named database
# you probably don't need to modify this value
# default value: elabftw
- DB_USER=elabftw
# MySQL password; a random password has been generated for you but feel free to change it if needed
# default value: generated randomly if you get the config from get.elabftw.net
- DB_PASSWORD=密匙
# Mysql Cert path: you only need this if you connect to a mysql server with tls
# Use a volume that points to /mysql-cert in the container
# optional
#- DB_CERT_PATH=/mysql-cert/cert.pem
#####################
# PHP CONFIGURATION #
#####################
# the timezone in which the server is
# better if changed (see list of available values: http://php.net/manual/en/timezones.php
#- PHP_TIMEZONE=Europe/Paris
#备注:原文是欧洲巴黎的时区,一般都在国内使用,因此设置为上海即可。
- PHP_TIMEZONE=Asia/Shanghai
# again
#备注:重复一次
#- TZ=Europe/Paris
- TZ=Asia/Shanghai
# optional: set the limit of simultaneous request that will be served
# see http://php.net/manual/en/install.fpm.configuration.php
# default value: 50
#- PHP_MAX_CHILDREN=50
# optional: adjust the max execution time of PHP scripts, in seconds
# default value: 120
#- PHP_MAX_EXECUTION_TIME=120
# optional: adjust the amount of memory available to PHP, increase it if you run into issues
# information: 2G of memory available to PHP might seem a lot. But realize this: it's not 2003 anymore. PHP is not just a few "if" and "foreach" in some html page.
# We use it to generate huge PDF files and archives, to manipulate potentially big images, and do complicated operations on thousands of objects fast.
# So yeah, the conservative 128 Mb default is obsolete when a simple photo taken with a phone can be 10 Mb.
# Most of the servers that run eLabFTW will run ONLY eLab and will easily have at least 4 Gb of RAM dedicated to this task.
# What is the point of having 4 Gb of RAM and let the main application use only a few percents of it...
# This doesn't mean that eLabFTW will consume that much memory all the time. 99% of the time it will have very low memory footprint.
# But from time to time, users will export many entries at once in PDF with big images in them and that's when you want to have some headroom!
# example value: 4G
# default value: 2G
#- MAX_PHP_MEMORY=2G
# optional: set a password to get access to /php-status, which will display various metrics about the php-fpm processes
# also works for /nginx-status, for metrics about nginx process
# if this is not set, a random password will be generated but never displayed, effectively disabling access to this endpoint
# the enpdoint can be accessed with the "elabftw" user, and the password you set below
# example value: my-cool-password
# default value: not set
#- STATUS_PASSWORD=
#########################
# ELABFTW CONFIGURATION #
#########################
# The secret key is used for encrypting the SMTP and Timestamping passwords
# A random one has been generated for you, if you wish to change it you can
# get another secret key from https://get.elabftw.net/?key
# if you don't want to get it from an external source you can also do that:
# docker run --rm -t --entrypoint '/bin/sh' elabftw/elabimg -c "php -d memory_limit=10M -d open_basedir='' bin/init tools:genkey"
# Note: the value MUST be generated as shown in the methods above.
# default value: generated randomly if you get the config from get.elabftw.net
- SECRET_KEY=密匙
# The canonical URL to the website, including port if not standard
# Use the user-facing URL here.
# example value: https://elab.uni-delta.fr
# example value: https://elab.uni-delta.fr:3148
#备注:这一段内容是极为关键并且很有意思的点,这个是可以设置多个识别域名的,因此我将其复制多行,便于后续调用与使用
- SITE_URL= https://你的内网群晖NAS的地址:访问端口
- SITE_URL= https://你的群晖外部IPV6访问地址:访问端口
- SITE_URL= https://[你的NAS的IPV6地址]:访问端口
- SITE_URL= https://你的NAS与你自己的FRP服务器设置后的frp服务器地址或域名:访问端口
#备注:针对FRP进行说明,由于frp的机制,因此内网机器的frp访问端口与外网作为frp访问节点的frp端口可以不一样,但是由于elabftw禁止子域名,因此两个端口设置必须一样。
- SITE_URL=
# optional: adjust maximum size of uploaded files
# default value: 100M
#备注:这里可以设置每次上传的文件大小,我是自己使用,因此修改为了
- MAX_UPLOAD_SIZE=300M
# optional: adjust maximum time for uploading files, in milliseconds
# default value: 900000
#- MAX_UPLOAD_TIME=900000
# optional: s3 storage credentials
#- ELAB_AWS_ACCESS_KEY=
#- ELAB_AWS_SECRET_KEY=
#######################
# NGINX CONFIGURATION #
#######################
# change to your server name in nginx config
# default value: localhost
# example value: elab.uni.edu
- SERVER_NAME=localhost
# optional: disable https, use this to have an http server listening on port 443
# useful if the SSL stack is handled by haproxy or something alike
# default value: false
- DISABLE_HTTPS=false
# set to true to use letsencrypt or other certificates
# note: does nothing if DISABLE_HTTPS is set to true
# default value: false
- ENABLE_LETSENCRYPT=false
# optional: enable ipv6 (make sure you have an AAAA dns record!)
# default value: false
#备注:因为为了IPV6的识别,因此这里我将IPV6功能修改了,默认是false。
- ENABLE_IPV6=ture
# optional: adjust the user/group that will own the uploaded files (and run the webserver)
# useful if your files are stored on an NFS mount point where the files ownership are imposed by the NFS server
# default value: nginx
# example value: nobody
#- ELABFTW_USER=nginx
# default value: nginx
# example value: nobody
#- ELABFTW_GROUP=nginx
# default value: 101
# example value: 65534
#- ELABFTW_USERID=101
# default value: 101
# example value: 65534
#- ELABFTW_GROUPID=101
# optional: enable if you want nginx to be configured with set_real_ip_from directives
# default value: false
#- SET_REAL_IP=false
# the IP address/addresses. Separate them with a , AND A SPACE. Several set_real_ip_from lines will be added to the nginx config. One for each.
# this does nothing if SET_REAL_IP is set to false
#- SET_REAL_IP_FROM=192.168.31.48, 192.168.0.42, 10.10.13.37
# optional: adjust the number of worker processes nginx will spawn
# default value: auto
# if auto doesn't work for you, use the number of cores available on the server (or less)
#- NGINX_WORK_PROC=auto
# optional: allow javascript code to call the API from an external service
# this will add a response header Access-Control-Allow-Origin with content of the env var as value
# mdn doc: https://developer.mozilla.org/en-US/docs/Web/HTTP/Headers/Access-Control-Allow-Origin
# default: header not set (empty value)
# example value: app.example.org
# example value: *
#- ALLOW_ORIGIN=
# optional: define methods allowed to javascript code calling the API from an external service
# this will add a response header Access-Control-Allow-Methods with content of the env var as value
# mdn doc: https://developer.mozilla.org/en-US/docs/Web/HTTP/Headers/Access-Control-Allow-Methods
# default: header not set (empty value)
# example value: GET, POST, PATCH
#- ALLOW_METHODS=
# optional: define headers allowed to javascript code calling the API from an external service
# this will add a response header Access-Control-Allow-Headers with content of the env var as value
# mdn doc: https://developer.mozilla.org/en-US/docs/Web/HTTP/Headers/Access-Control-Allow-Headers
# default: header not set (empty value)
# example value: Content-Type, Authorization
#- ALLOW_HEADERS=
# optional: modify the keepalive_timeout value
# nginx doc: http://nginx.org/en/docs/http/ngx_http_core_module.html#keepalive_timeout
# default: 10s
# example value: 5s
#- KEEPALIVE_TIMEOUT=10s
#######################
# REDIS CONFIGURATION #
#######################
# optional: use a redis server to store the PHP sessions
# default value: false
#- USE_REDIS=false
# optional: set an IP or hostname for the redis server
# default value: redis
#- REDIS_HOST=redis
# optional: set a custom port for redis
# default value: 6379
#- REDIS_PORT=6379
# optional: set a username for redis
# default value:
#- REDIS_USERNAME=
# optional: set a password for redis
# default value:
#- REDIS_PASSWORD=
######################
# LDAP CONFIGURATION #
######################
# optional: configure ldap certificate verification behavior: will create /etc/openldap/ldap.conf with TLS_REQCERT config line
# default value: false
# possible values: never, allow, try
#- LDAP_TLS_REQCERT=false
#################
# MISCELLANEOUS #
#################
# optional: be less verbose during init
# default value: false
#- SILENT_INIT=false
# optional: automatically install the database structure on container start
# default value: false
#- AUTO_DB_INIT=false
# optional: automatically update the database structure on container start
# default value: false
#- AUTO_DB_UPDATE=false
#######
# DEV #
#######
# set to true in a development environment.
# This will remove php cache, serve assets directly (instead of the brotli/gzip version) and make composer available.
# default value: false
#- DEV_MODE=false
ports:
# Important note about exposing ports: due to the way Docker deals with the host firewall, it is recommended to use '127.0.0.1:1234:443'
# if you only want to expose the service locally (on port 1234 in this example). See https://github.com/moby/moby/issues/22054
# Another option is to use the "expose" directive instead of "ports" and let your reverse proxy figure things out.
#
# if you want elabftw to run on a different port, change the first number
# host:container
#备注:这里的访问端口我使用中文进行替代,后续需要替换为你自己所设置的端口
- '访问端口:443'
# if you are aiming for running multiple instances of this container you can put a range like s
# 如果要有多个实例运行,那么就需要一个端口对应一个实例,这里可以设置成多个端口对应
# - "3100-3200:443"
# use redis for session storage if that is the case, or configure your load balancer with sticky sessions
volumes:
# this is where you will keep the uploaded files persistently
# for Windows users it might look like this
# - D:\Users\Nico\elab-data\web:/elabftw/uploads
# host:container
#备注:这里是关键的文件夹选项,要进行个性化的设置,冒号之前就是群晖中的地址。
- /volume1/群晖的一级文件夹名/群晖的二级文件夹名/upload:/elabftw/uploads
#
# TLS configuration
#
# Note: if your certificate is not from letsencrypt, make sure to have those two files:
#
# /etc/letsencrypt/live/SERVER_NAME/fullchain.pem
# /etc/letsencrypt/live/SERVER_NAME/privkey.pem
#
# in the folder /etc/letsencrypt (or any folder you like as long as you adapt the line below
# replace SERVER_NAME with the value of SERVER_NAME of course.
#
# if you have enabled letsencrypt, uncomment the line below
# path to the folder with TLS certificate + private key
# host:container
#- /etc/letsencrypt:/ssl
#
# MYSQL cert path
#- /path/to/cert/folder:/mysql-cert
# This part is just an example for having a custom DNS entry in /etc/hosts of the container
# Use it if DNS resolution cannot work for some reason
# The "extra_hosts" key must be aligned at the same indentation level as "ports" or "volumes" or "networks" blocks.
#
# extra_hosts:
# - internal.s3.example.org:10.12.34.56
networks:
- elabftw-net
# the mysql database image
# Note: if you already have a MySQL server running, you don't need to use this image, as you can use the already existing one
# In this case, add the IP address of the server in DB_HOST and comment out or remove this block
mysql:
image: mysql:8.0
#备注:将自动重启关闭
#restart: always
# fix issue with "The server requested authentication method unknown to the client [caching_sha2_password]"
# now commented out because no longer necessary
#command: --default-authentication-plugin=mysql_native_password
container_name: mysql
# add an healthcheck block so the web container knows when it is ready to accept connections
# use double $ here so env vars are correctly found
healthcheck:
test: "/usr/bin/mysql --user=$$MYSQL_USER --password=$$MYSQL_PASSWORD --execute 'SHOW DATABASES;'"
interval: 5s
timeout: 5s
retries: 42
# drop some capabilities
cap_drop:
- AUDIT_WRITE
- MKNOD
- SYS_CHROOT
- SETFCAP
- NET_RAW
cap_add:
- SYS_NICE
environment:
# need to change
- MYSQL_ROOT_PASSWORD=密匙
# no need to change
- MYSQL_DATABASE=elabftw
# no need to change
- MYSQL_USER=elabftw
# need to change IMPORTANT: this should be the same password as DB_PASSWORD from the elabftw container
- MYSQL_PASSWORD=密匙
# need to change, this is your timezone, see PHP_TIMEZONE from the elabftw container
#同样需要修改时区设置
#- TZ=Europe/Paris
- TZ=Asia/Shanghai
# Update this if you want to run the server on a different port than 3306.
# - MYSQL_TCP_PORT=3306
volumes:
# this is where you will keep the database persistently
# for Windows users it might look like this
# - D:\Users\Nico\elab-data\mysql:/var/lib/mysql
# host:container
#备注:这里就是mysql文件夹的同步信息。
- /volume1/群晖的一级文件夹名/群晖的二级文件夹名/mysql:/var/lib/mysql
# The mysql container exposes 3306/33060. Though it does not make an operational difference,
# make sure to document your usage here.
expose:
- '3306'
networks:
- elabftw-net
# example of a redis container
# uncomment if you want to spawn a redis container to manage sessions
#redis:
# image: redis:6.0-alpine
# restart: always
# container_name: redis
# networks:
# - elabftw-net
# example of a keeex container (experimental!)
#keeex:
# image: repo.keeex.me/fkeeex_daemon:latest
# container_name: keeex
# restart: always
# environment:
# - FKEEEX_CONFIG_PASSWORD=
# # Set a random passphrase here. You can generate one with "openssl rand -base64 32".
# - FKEEEX_CONFIG_PASSPHRASE=
# expose:
# - 8080
# networks:
# - elabftw-net
###############################################################
# EVERYTHING BELOW THIS LINE IS FOR DEVELOPMENT PURPOSES ONLY #
# Except for the networks lines, so don't delete them! #
###############################################################
# PHPMYADMIN
# uncomment this part if you want to have phpmyadmin running too
#phpmyadmin:
# image: phpmyadmin/phpmyadmin
# container_name: phpmyadmin
# environment:
# - PMA_PORT=3307
# links:
# - mysql:db
# ports:
# - "8080:80"
# networks:
# - elabftw-net
# SWAGGER UI
# swagger allows you to consult the documentation generated by apidoc/v2/openapi.yaml
# running a local container is perfect to see the changes right after a change
#
#swagger:
# image: swaggerapi/swagger-ui:v5.0.0
# restart: always
# container_name: swagger-elab-local
# ports:
# - "8085:8080"
# volumes:
# - /path/to/local/elabftw/apidoc/v2:/usr/share/nginx/html/swagger:ro
# environment:
# - API_URL=swagger/openapi.yaml
# networks:
# - elabftw-net
# LDAP
# example for ldap server + admin interface
# uncomment if you want to work on LDAP authentication
#ldap:
# image: osixia/openldap:1.4.0
# container_name: ldap
# restart: always
# hostname: example.org
# environment:
# - LDAP_TLS_VERIFY_CLIENT=try
# - LDAP_OPENLDAP_UID=1000
# - LDAP_OPENLDAP_GID=1000
# ports:
# - "389:389"
# - "636:636"
# volumes:
# - /var/elabftw/ldap-data/ldap:/var/lib/ldap
# - /var/elabftw/ldap-data/slapd.d:/etc/ldap/slapd.d
# networks:
# - elabftw-net
#ldapadmin:
# image: osixia/phpldapadmin:0.9.0
# container_name: ldapadmin
# environment:
# - PHPLDAPADMIN_LDAP_HOSTS=ldap
# restart: always
# ports:
# - "6443:443"
# networks:
# - elabftw-net
# the internal elabftw network
networks:
elabftw-net:
